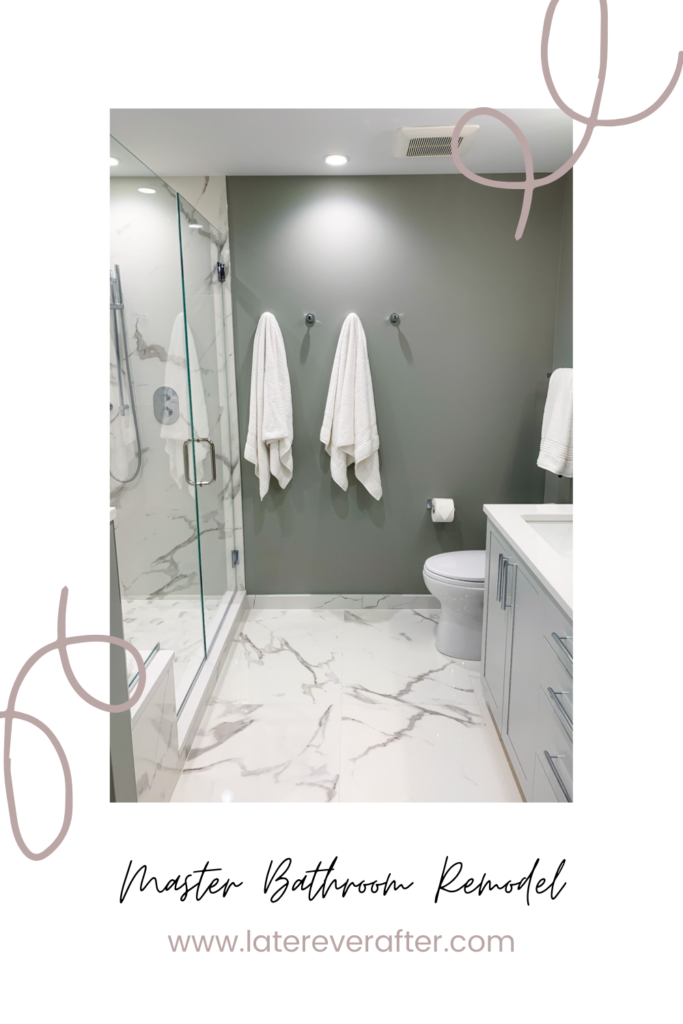
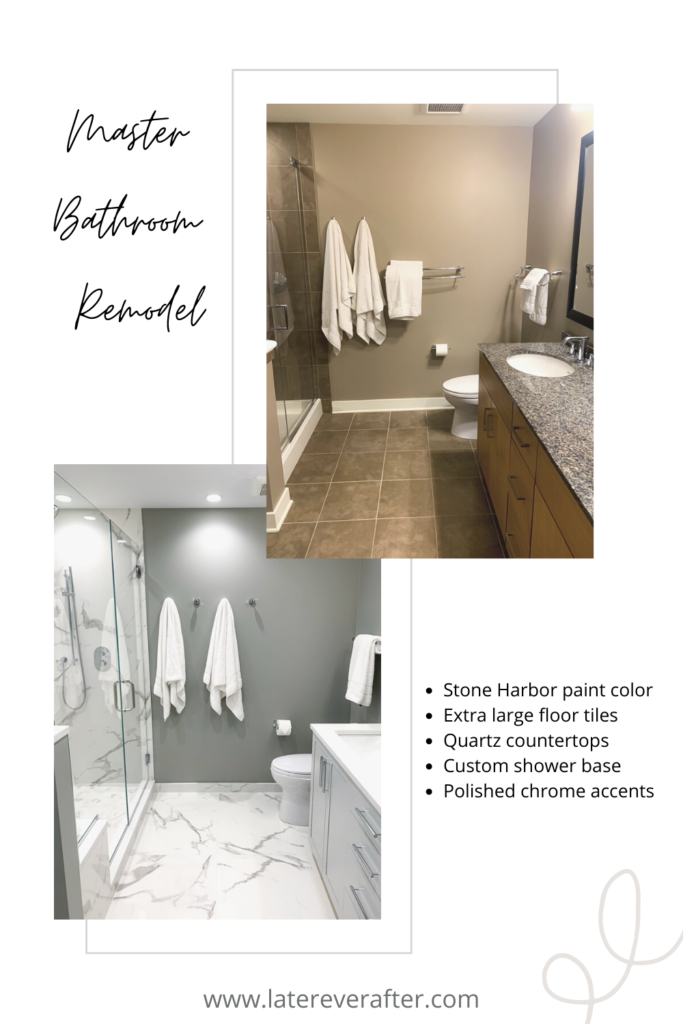
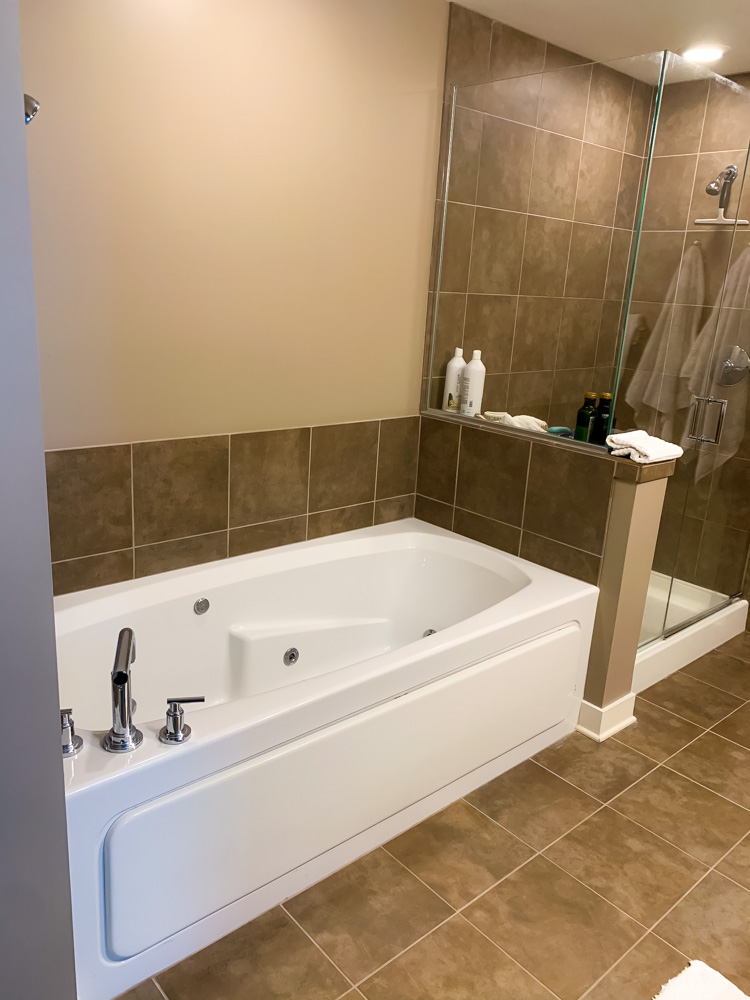
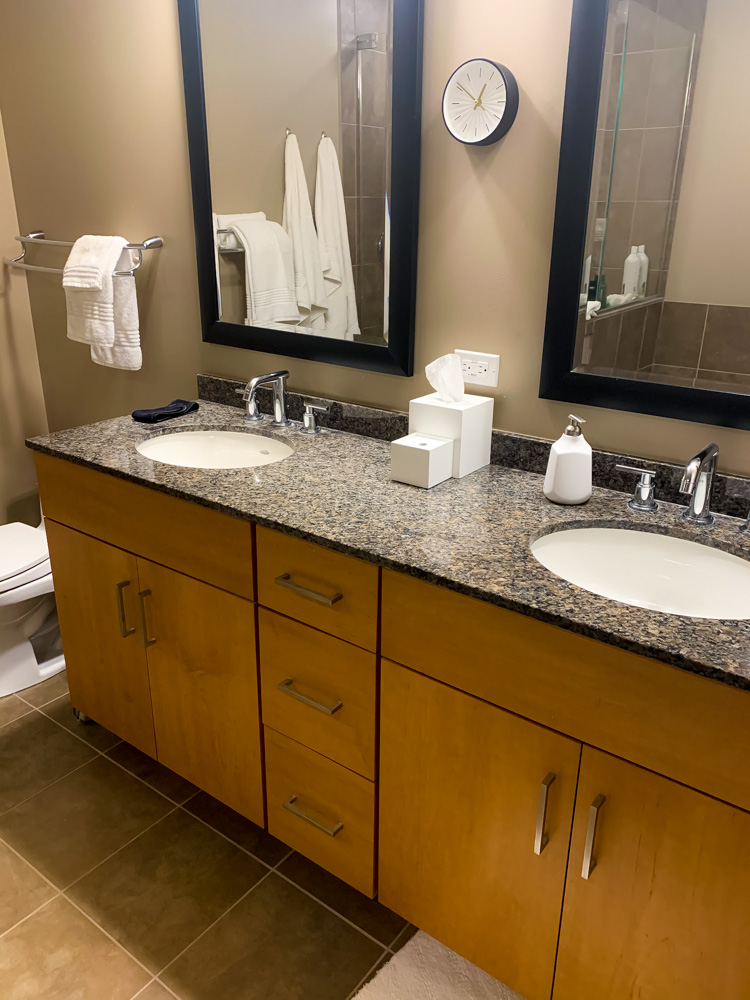
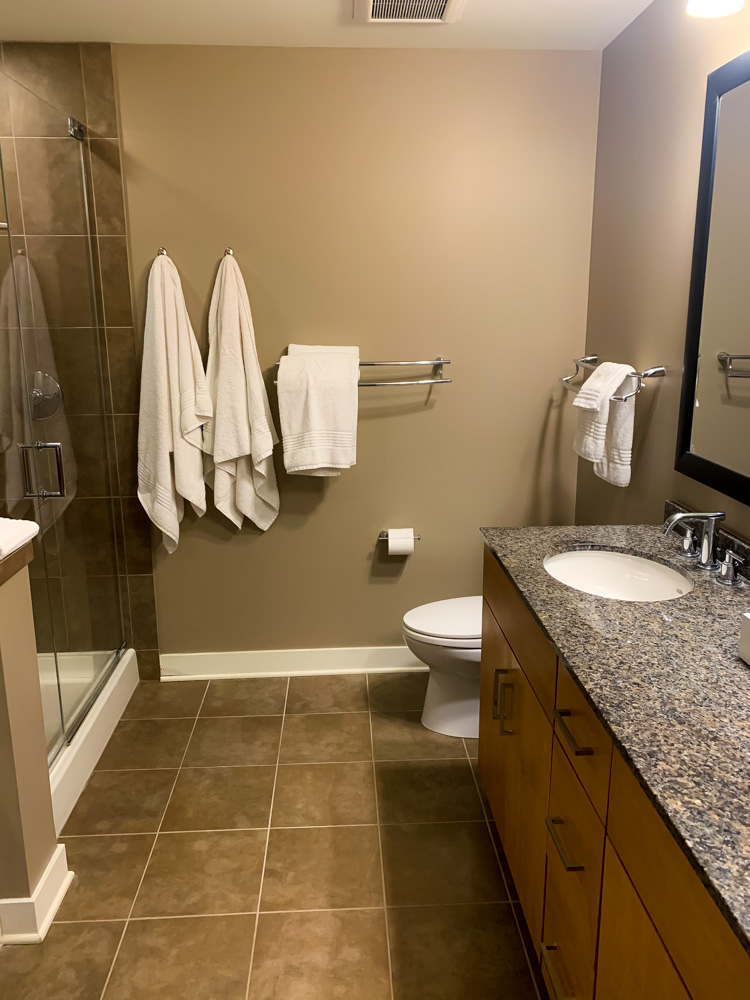
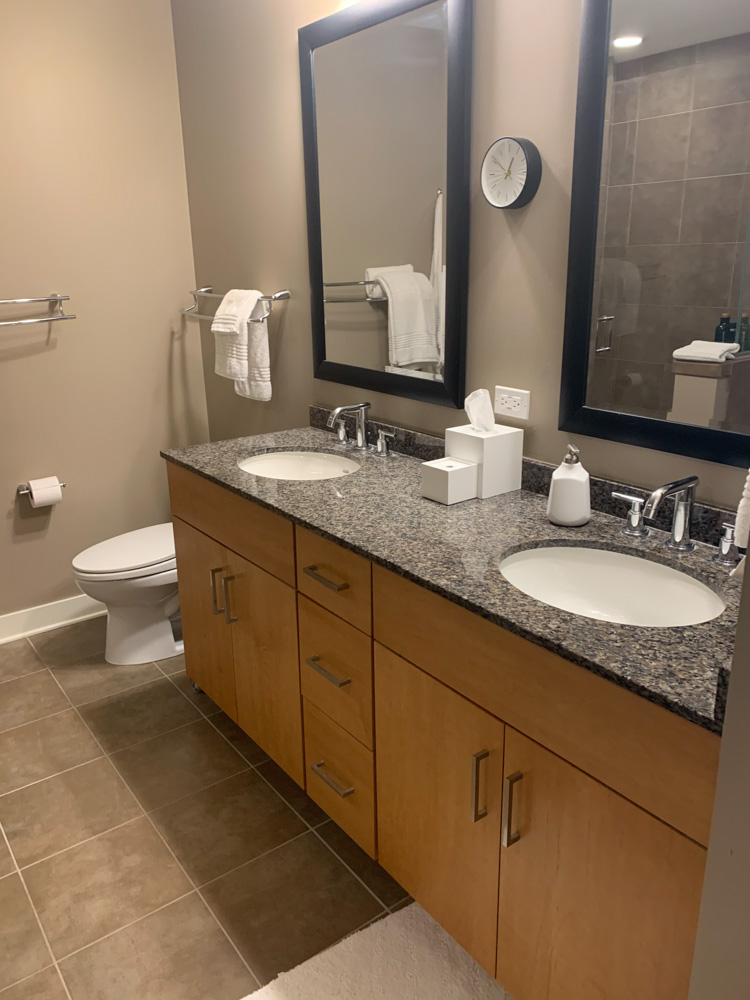
2020 was the year of home projects for us. We had planned a master bathroom remodel when we originally bought our condo. The bathroom was good, but it needed an update and a more modern feel. When our condo was built it was the era of beige and brown tones, which just isn’t our style. We have a very modern style and LOVE grey, almost too much of it!
Being that we live in a condo we knew we couldn’t do much structurally for the master bathroom remodel. Knocking down walls and making it bigger didn’t make sense as we would have to take away from our living space. But storage and a mini laundry room are necessities. My dream is to have a huge laundry room, with storage, hanging racks to dry clothes and a huge sink in which to wash muddy things. However, my other dream is living in downtown Chicago, which means I have to give up a little space sometimes. And that means no huge laundry room.
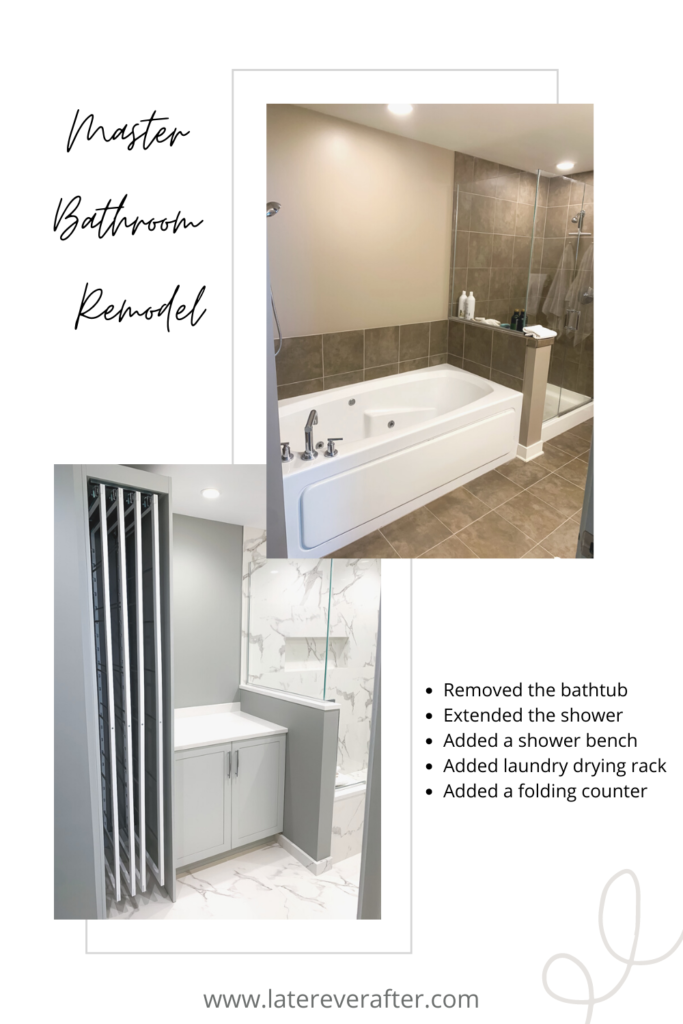
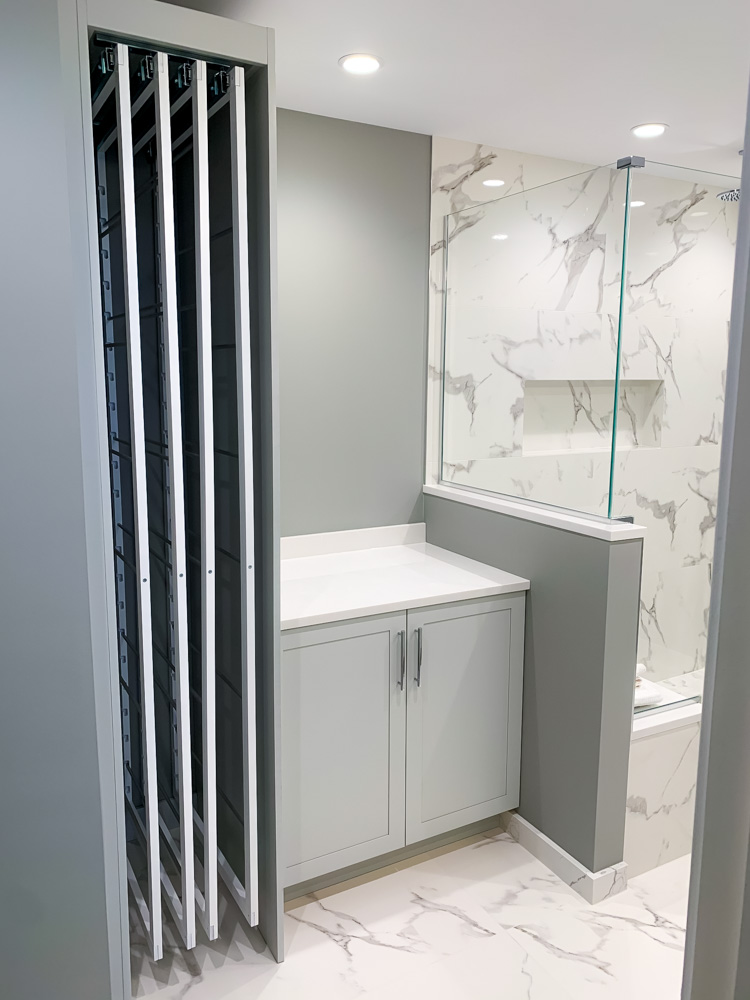
To accomplish my dream laundry room we removed the bathtub, added more storage and a semi-concealed drying rack. And the drying rack is my most favorite thing in the bathroom. Even though my contractor flat out told me it was stupid, I LOVE it. So let me show you some of my favorite features of our master bathroom remodel up close.
Master Bathroom Remodel
The Shower
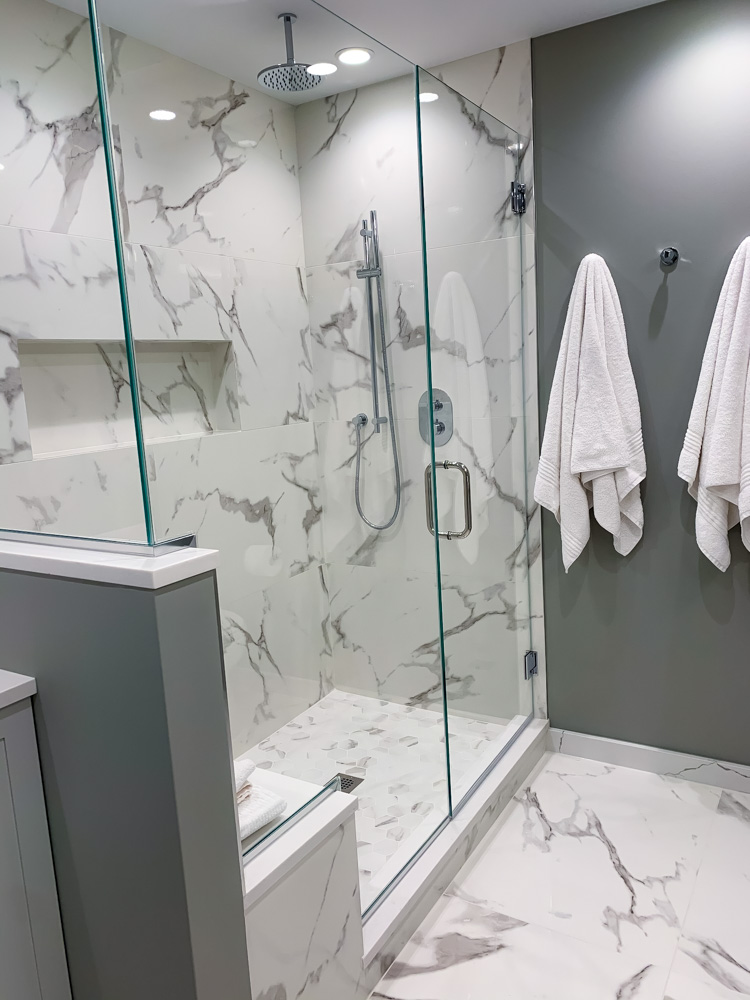
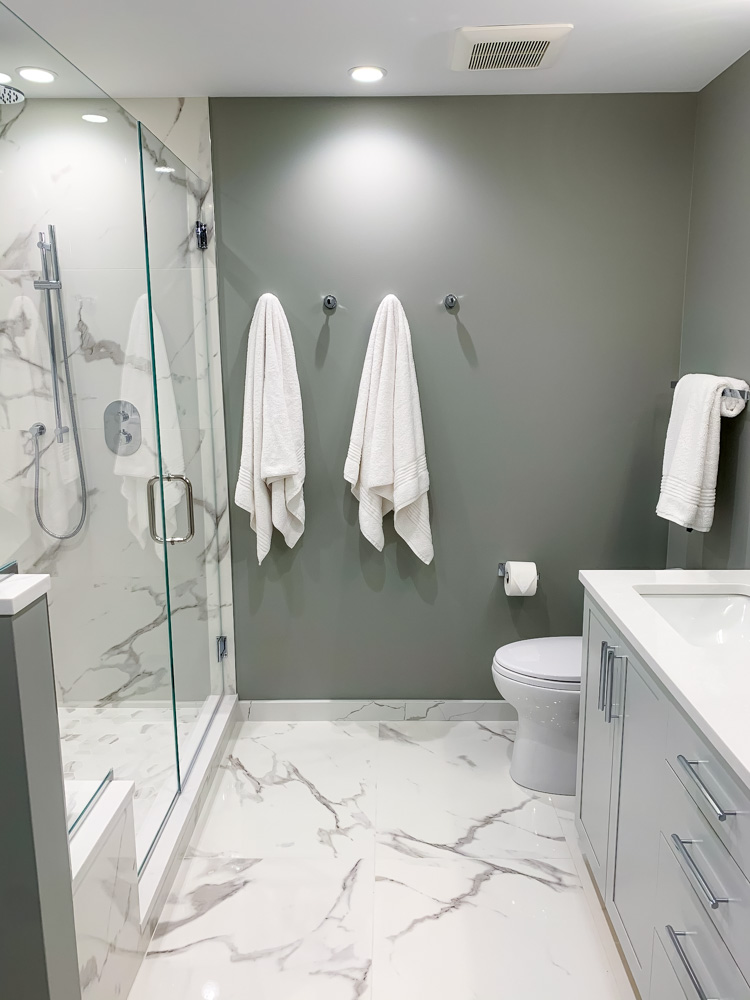
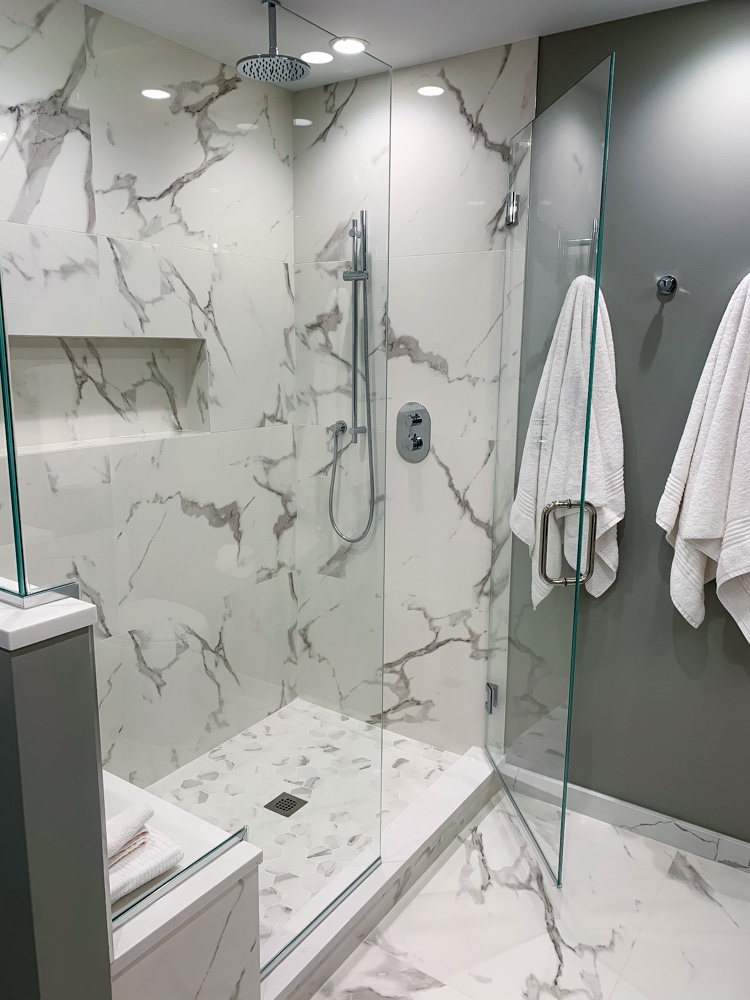
Another dream item in my house was to have a shower that reminded me of the luxury hotel. To achieve that look, we selected extra large tiles and placed them floor to ceiling. We extended the shower length to make it bigger and added in a custom bench. And we upgraded the glass, which I think we got scammed on. We were presented with two glass choices one had a blue tint to it and the other was crystal clear. Clearly we wanted the crystal clear one and it happened to be an upgrade. I personally think no one chooses the blue one and they don’t actually produce it, it’s merely used to scam people into the pricier option. I’ll never know though!
We also opted to not put in additional supports down the glass to give it that clean look. We were advised not to as it would negate the warranty on the glass. The warranty was only good for a year so we took our chances and I’m glad we did.
Cabinets
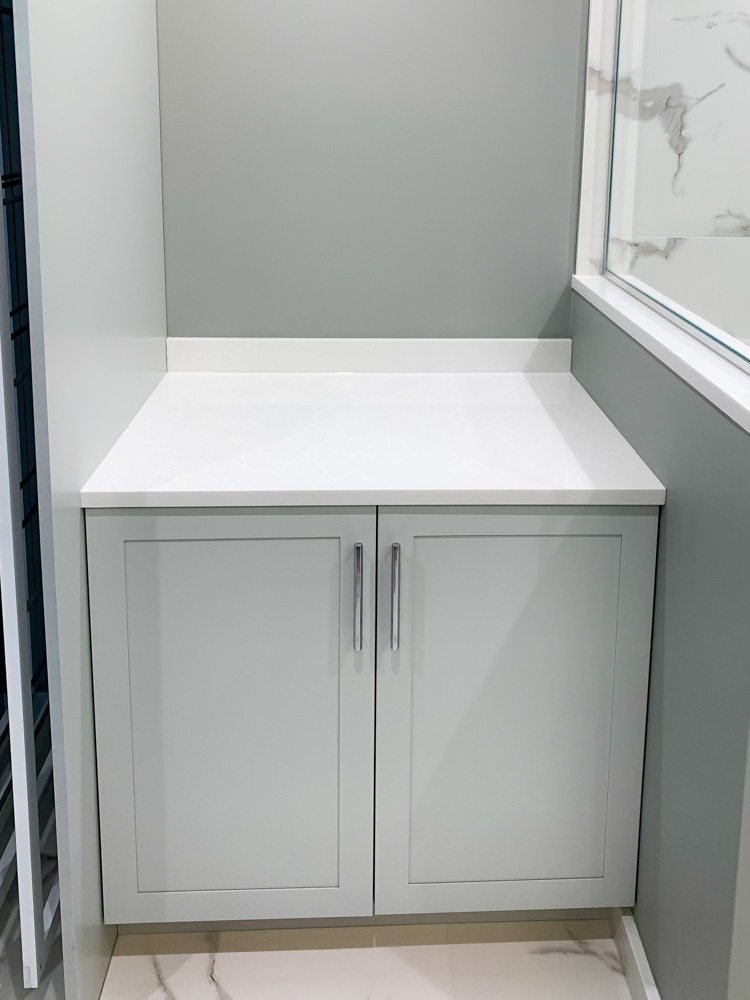
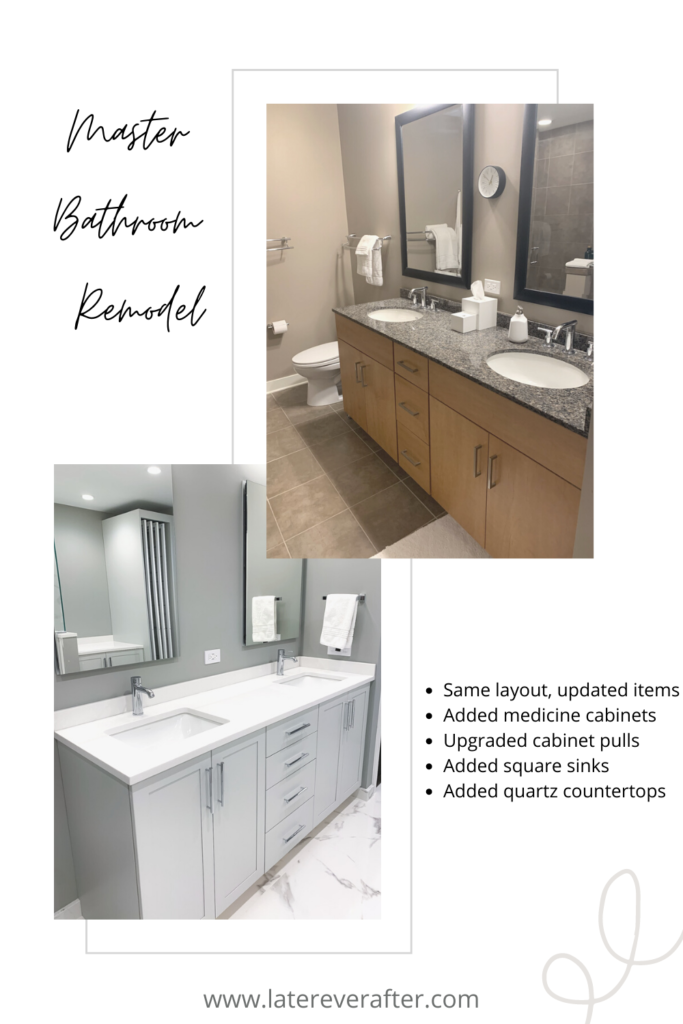
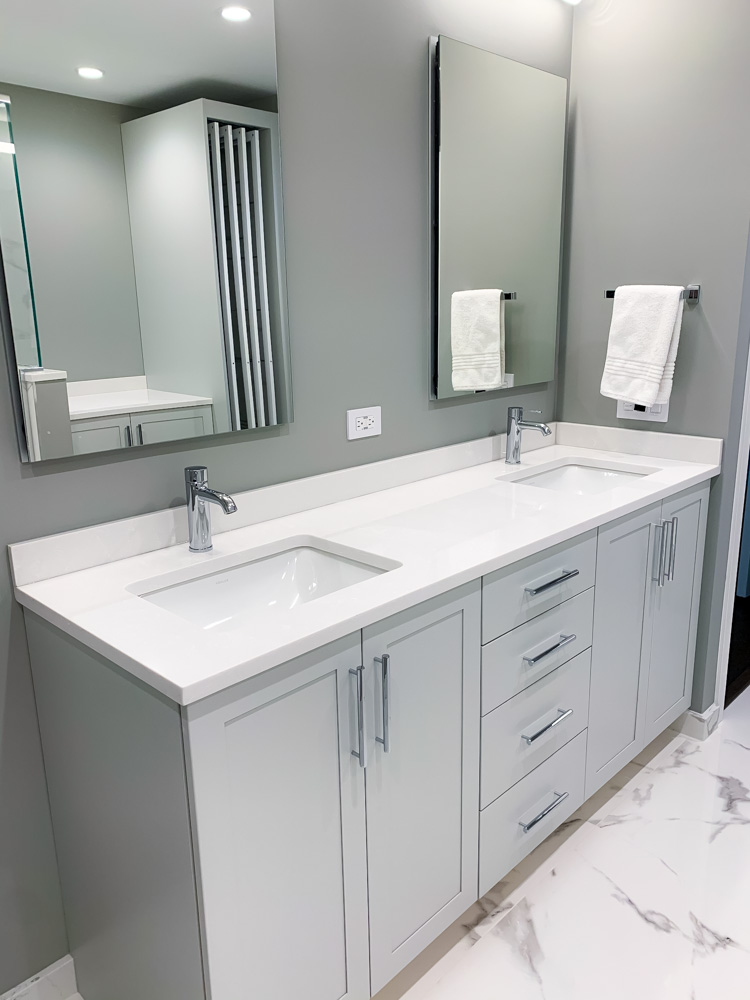
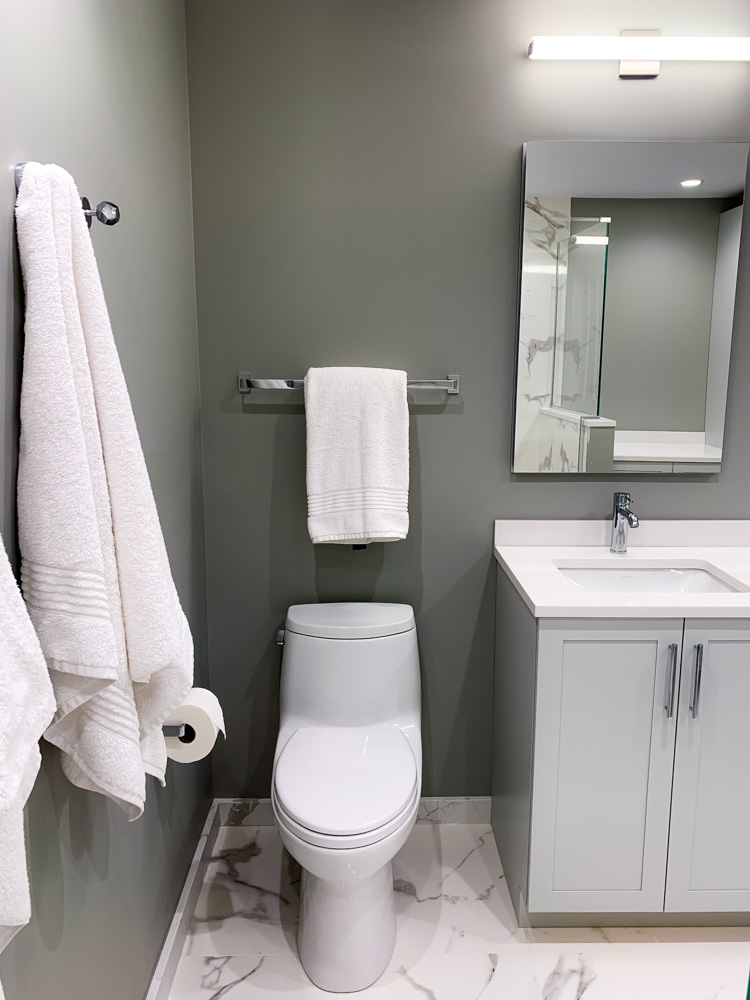
We went very basic on the cabinets, in a light grey color. Instead of spending money on the cabinets we upgraded the handles and picked up the beautiful hardware from Rejuvenation. The cabinets do have a soft close, which was a great surprise for me. I didn’t realize we had them until I shut the drawer for the first time. I was so excited!
We also added cabinets on the back wall where the bathtub used to be. This created a ton of extra space for us. Space is a hot commodity when you live in a condo, so the more I can get the better. The cabinet counter also serves as a great place to fold laundry in my mini laundry room.
Drying Rack
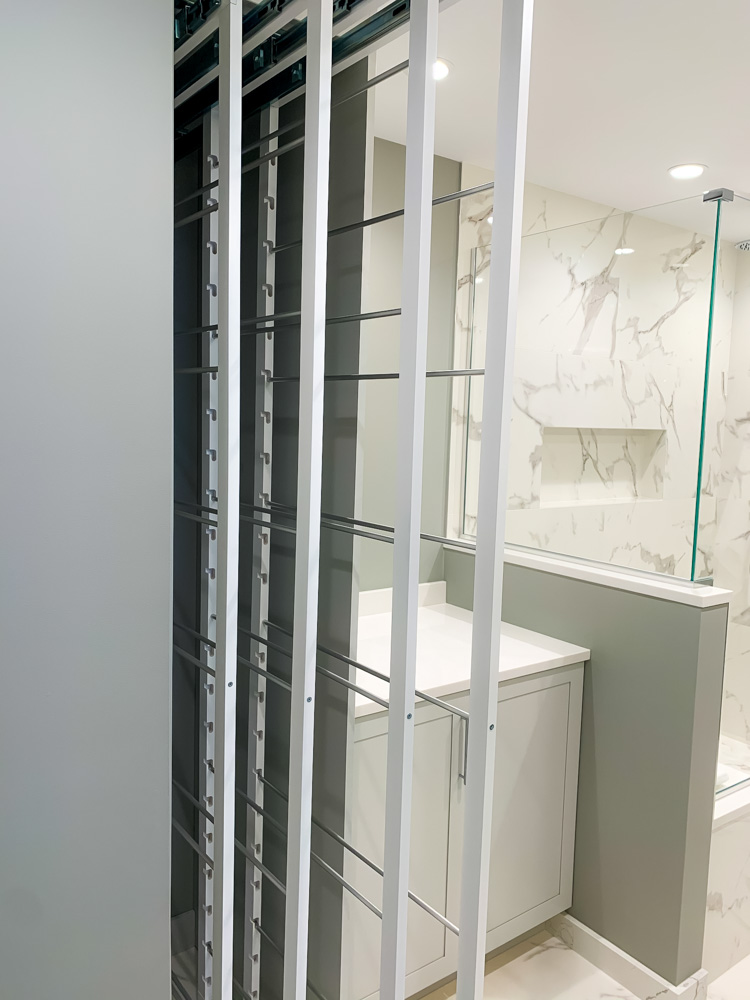
This drying rack is what dreams are made of. I only put about a quarter of my laundry in the dryer. I typically wash and hang wet all my tops, pants, dresses and anything I’m trying to preserve and let it air dry. The heat from the dryer is hard on clothing items and air drying them extends their life. The rack we purchased is from a company called DryAway.
They have a few options of rack heights and lengths, but the concept is the same. They are racks on a roller that slide in and out of an open cabinet or structure. It is purely the air that circulates that dries the clothes. In my bathroom, with no flowing air, the clothes dry overnight. I thought seeing the racks everyday would bother me, but they don’t at all. I was able to achieve my dream laundry room without having to look at my laundry.
Remodel
The whole remodel took about 10 weeks which was 4 weeks longer than I was promised. Needless to say I was ready to kick the contractor and his workers out of my condo, but I really needed the bathroom done. Overall, I was very happy with how the whole bathroom came out. The one lesson I learned is that you have to check peoples work. Now I know I’m slightly crazy, but every night I would check their work. I would measure everything and question it the next morning if it didn’t make sense. Several times my checking avoiding major disasters, like a crooked wall, an off centered outlet, too thick baseboards, upside down drains, large gaps in the tile and uneven surfaces. So the lesson is…CHECK EVERYTHING!
We still need to get artwork in the bathroom and I’m hoping to do it by the end of this year. I know it sounds long, but you have no idea how hard it is for me to find artwork I like.
Sources
If I was able to link it for you all, I did it below. Somethings I wasn’t able to find online, but I’ve noted the store we purchased it at.
- Paint – Benjamin Moore Stone Harbor
- Cabinets – Studio 41
- Cabinet Pulls – Rejuvenation
- Vanity Lights – Sonneman
- Tile – Casablanca Glazed Polish from A-American Custom Flooring
- Counter Tops – Quartz Perla White
- Drying Rack – Dry Away
- Rain Shower Head
- Faucet
- Shower Handle Bar
- Shower Converter (aka faucet plate)
- Towel Hooks – Restoration Hardware
- Medicine Cabinets – Kohler
- Toilet Paper Holder in Polished Chrome – Rejuvenation
- Towel Bars in Polished Chrome – Rejuvenation
- Toilet – Toto
Now for the fun part…before and after photos! The first set of photos highlight the biggest changes that we made in the bathroom. The second set of photos are true before and after photos.
Before
After



Comments
Comments are closed